Effective Solutions to 8 Common Pest Problems from an Exterminator Stuart FL

Exterminators in warehouse spraying pesticides with sprayer Exterminators in warehouse spraying pesticides with sprayer team pest control stock pictures, royalty-free photos & images

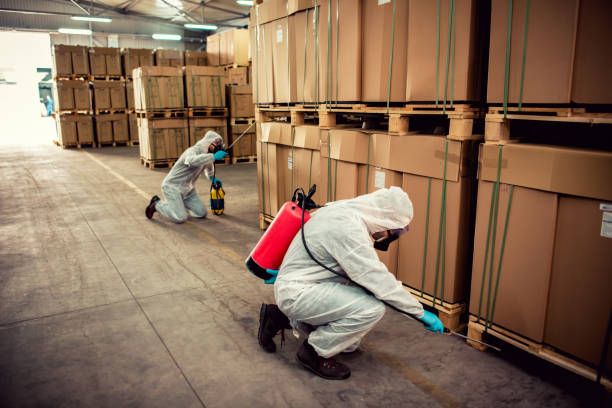
Pest problems can quickly spiral out of control, posing risks to health, property, and overall comfort. Professional exterminators are trained to address a wide range of pest infestations, offering tailored solutions to keep your home or business pest-free. Below are eight of the most common pest problems exterminators can help resolve effectively.

1. Termites: Silent Destroyers

Termites are notorious for causing extensive structural damage by feeding on wood and cellulose-based materials.

  • Mud tubes near foundations
  • Hollow-sounding timber
  • Discarded wings near windowsills

Exterminators like https://www.stuartpestcontrol.net use methods such as liquid termiticides, baiting systems, and wood treatments to eliminate termites and prevent future infestations.

2. Rodents: Mice and Rats

Rodents can contaminate food supplies, chew on electrical wiring, and spread diseases like hantavirus.

  • Droppings in cabinets or drawers
  • Gnaw marks on surfaces
  • Scratching noises at night

Professionals deploy traps, rodenticides, and exclusion techniques to ensure your space remains rodent-free.

3. Bed Bugs: Persistent Invaders

Bed bugs are small but resilient pests that hide in cracks and crevices of furniture and mattresses.

  • Luggage after travel
  • Second-hand furniture purchases

Heat treatments coupled with targeted insecticides are commonly used by pest control experts to eradicate these pests.

4. Ants: Colonizing Pests

Ant infestations can range from nuisance species like sugar ants to destructive carpenter ants.

  • Seal entry points such as windows and door frames
  • Store food in airtight containers

Exterminators may recommend baiting solutions or perimeter treatments based on the ant species identified.

Table: Common Ant Species and Treatment Options

Ant Type Behavior Treatment Method
Sugar Ants Attracted to sugary foods Bait stations
Carpenter Ants Bore into wood Insecticidal sprays
Fire Ants Aggressive stingers Nest-targeted treatment

5. Roaches: Disease Carriers

Cockroaches thrive in warm, humid environments where food crumbs or clutter accumulate.

  • Health Risks: Cockroaches carry bacteria such as Salmonella that can cause food poisoning.

Integrated pest management (IPM) strategies including sanitation efforts and chemical controls are highly effective against roaches.

6. Spiders: Creepy Crawlers

While most spiders pose minimal risks to humans, species like black widows or brown recluses may require professional handling due to their venomous bites.

  • Control Measures: Regular cleaning of corners and eliminating other pests (spider prey) significantly reduces infestations.

Summary Chart: Spider Reduction Tips

Action Effectiveness
Remove webs regularly High
Declutter storage areas Moderate
Use pesticide sprays High

7. Wasps & Bees: Stinging Hazards

Wasps build nests outdoors or inside wall voids, while bees often swarm during warmer months.

Professional exterminators utilize protective equipment to safely remove nests without harming beneficial bee populations when possible.

8. Wildlife Intrusions

From raccoons rummaging through garbage bins to squirrels nesting inside attics, wildlife incursions require humane yet effective removal strategies including trapping or exclusion techniques combined with repairs of entry points.

Professional extermination services not only eliminate current problems but provide long-term prevention plans tailored for each unique situation, ensuring peace of mind for homeowners and business owners alike.

Effective Stuart Pest Control Tips for Identifying and Eliminating Termites, Rodents, and Other Pests in Your Home

Dealing with pests in your home can be both stressful and challenging. Whether it’s termites silently damaging your property, rodents contaminating food supplies, or other unwelcome intruders, early identification and effective elimination are crucial. Here’s a detailed guide on identifying and removing some of the most common pests homeowners face.

Termites

Termites can be devastating to wooden structures as they feed on cellulose found in wood and paper materials. Look for the following signs of infestation:
Mud tubes: Small mud tunnels along walls or foundations used by termites for protection.
Hollow wood: Tap on wooden surfaces; a hollow sound may indicate termite activity inside.
Discarded wings: Winged termites (swarmer’s) shed their wings near entry points like windows or doors.
Frass (termite droppings): Tiny wood-colored pellets found near infested areas.

Rodents (Mice and Rats)

Rodents carry diseases and can chew through electrical wires, causing significant damage. Signs of rodent infestation include:
Droppings: Dark pellet-shaped droppings near food storage areas or along floorboards. – Gnaw marks: Chewed wiring, furniture edges, or food packaging. – Nesting materials: Shredded paper, fabric, or insulation gathered in hidden corners. – Noises: Scratching sounds in walls or attics during nighttime when rodents are most active.

Other Pests

Additional pests like ants, cockroaches, and bed bugs may invade your home. Key identification clues include: | Pest | Identifying Signs | |—————-|—————————————————| | Ants | Trails leading to food sources; small soil mounds near entry points. | | Cockroaches | Musty odor; droppings resembling coffee grounds; smear marks along walls. | | Bed bugs | Rust-colored stains on sheets; itchy bites in clusters; live insects hiding around mattress seams.|

Effective Pest Removal Stuart FL: Keep Your Home Pest-Free

1. Address Entry Points

Seal cracks around windows, doors, pipes, and vents using caulk or weather stripping to prevent pest access.

2. Maintain Cleanliness

A clean environment discourages pest activity:

– Store food in airtight containers.

– Dispose of garbage regularly.

– Vacuum floors frequently to remove crumbs.

3. Use Baits and Traps

For rodents: 

– Place snap traps or live traps along walls where rodent activity is observed. 

For ants and cockroaches: 

– Use commercial bait stations that attract pests and eliminate colonies at their source.

4. Deploy Natural Remedies

If you prefer eco-friendly methods: 

– Sprinkle diatomaceous earth around infested areas for crawling insects. 

– Use peppermint oil-soaked cotton balls as a deterrent for mice.

5. Call Professional Exterminators

Exterminators in warehouse spraying pesticides with sprayer Exterminators in warehouse spraying pesticides with sprayer team pest control stock pictures, royalty-free photos & images

Severe infestations often require professional intervention: 

– They use specialized tools such as heat treatments for bed bugs or fumigation techniques for termites. 

– Licensed professionals also provide long-term prevention solutions tailored to your home’s needs.

Preventing Future Infestations

After addressing an infestation, preventive measures are key: 

  1. Regularly inspect your home’s foundation for cracks or gaps that pests might exploit. 2. Keep firewood stored far from the house to deter termites. 
  2. Trim tree branches near roofs to reduce rodent pathways into attics. 
  3. Ensure proper drainage around your property to avoid water accumulation that attracts insects.

By identifying issues early on and using targeted strategies for elimination, you can protect your home from damage while ensuring a safe living environment free of unwanted pests.

Comprehensive Guide to Getting Rid of Spiders, Roaches, Bed Bugs, and More

Pests like spiders, roaches, bed bugs, and other common household invaders are not just a nuisance; they can pose health risks and damage your property if left untreated. This guide provides a detailed approach to identifying, managing, and eliminating these pests effectively.

Identifying Common Household Pests

  1. Often found in dark corners or undisturbed areas such as basements and attics.
  2. Spiders spin webs that may be circular (orb weavers) or irregular (cobweb spiders).
  3. While most spiders are harmless, certain species like the black widow or brown recluse can be dangerous.
  4. Appear light brown or dark brown with long antennae.
  5. Active at night; often hide in cracks, cabinets, or under appliances during the day.
  6. Known for contaminating food and spreading bacteria such as Salmonella.
  7. Small, oval-shaped insects that hide in mattresses, bed frames, or furniture joints.
  8. Leave behind reddish-brown stains on sheets and furniture from crushed bugs or fecal matter.
  9. Cause itchy bite marks on the skin often arranged in lines or clusters.
  10. Ants: Frequently found near food sources; leave trails for other ants to follow.
  11. Silverfish: Prefer damp locations such as bathrooms; known for damaging books and fabrics.

Strategies for Pest Control

  1. Regularly dust cobwebs using a vacuum cleaner or broom.
  2. Seal cracks around doors and windows with caulk to prevent entry.
  3. Reduce clutter in storage spaces to eliminate hiding spots.
  4. Use bait stations with slow-acting insecticides containing hydramethylnon or fipronil.
  5. Store food in airtight containers and clean up crumbs immediately.
  6. Fix leaky pipes since roaches thrive in moist environments.
  7. Wash bedding, curtains, and clothing with hot water followed by a high-heat dryer cycle.
  8. Vacuum infested areas regularly include seams of mattresses and upholstered furniture.
  9. Consider using encasement covers specifically designed for mattresses to trap bed bugs inside.
  10. Other Pests: | Pest | Recommended Solution | |—————-|————————————————————————————-| | Ants | Create barriers with diatomaceous earth around ant trails | | Silverfish | Use sticky traps combined with dehumidifiers to minimize moisture-laden areas |

Preventative Measures

  • Maintain cleanliness by routinely sweeping floors and wiping surfaces where crumbs may accumulate.
  • Keep outdoor trash bins tightly sealed to deter pests from gathering near your home.
  • Trim shrubs and trees that touch your house as these can act as bridges for pests like ants or spiders.

By combining identification techniques with targeted control measures while implementing preventative practices consistently, homeowners can create an environment that deters common pests permanently without relying solely on reactive strategies.

Understanding Bird Proofing and How It Helps Prevent Pest Infestations

Bird proofing is an essential component of pest control that is often overlooked. While birds may not seem as harmful as rodents or insects, they can cause significant damage to properties and create environments conducive to other pest infestations. Implementing effective bird proofing measures can safeguard your property, protect your health, and help maintain a clean surrounding.

Why Bird Proofing is Important

  • Structural Damage: Birds often build nests in gutters, vents, or roof crevices. Over time, this can block drainage systems or harm roofing materials.
  • Health Risks: Bird droppings may carry diseases like histoplasmosis or salmonella. These droppings can also contaminate surfaces and create unsanitary conditions.
  • Secondary Pest Infestations: Birds attract insects such as mites and lice that can spread throughout your property.
  • Noise Pollution: Persistent bird calls or activities can be disruptive to daily activities and affect the overall quality of life.

Common Bird Proofing Methods

There are several techniques available for bird proofing. The best solution often depends on the type of bird problem you are facing and the structure of your property.

  1. Bird netting: Prevents birds from accessing specific areas like balconies or building facades.
  2. Spikes: Installed on ledges or roof edges to deter birds from landing.
  3. Wire systems: Creates tension across surfaces to reduce perching opportunities.
  4. Reflective tape: Creates visual reflections that scare birds away.
  5. Predator decoys (like hawk figurines): Mimic natural threats to keep birds at bay.
  6. Devices that emit high-frequency sounds to repel birds without causing harm are an environmentally friendly option.
  7. Non-toxic sprays can be applied to encourage birds to find alternative nesting sites.

Benefits of Bird Proofing

Benefit Description
Improved Property Health Reduces damage caused by nesting and droppings
Lower Maintenance Costs Prevents clogging in gutters or vents caused by nests
Enhanced Hygiene Minimizes exposure to diseases carried by birds
Pest Control Synergy Eliminates secondary pest infestations like mites and insects attracted by birds

Professional Assistance in Bird Proofing

While some bird proofing methods can be implemented on a DIY basis, consulting a professional exterminator ensures long-lasting results tailored specifically for your property’s needs. Experts assess the severity of your bird problem and recommend customized solutions while adhering strictly to wildlife protection laws.

Investing in bird proofing not only mitigates current issues but also prevents long-term complications associated with pest infestations caused by unchecked avian activity. Protect your home or business by taking proactive steps today toward ensuring a clean, safe environment free from hazards associated with nuisance birds.

Effective Strategies to Get Rid of Flickers and Protect Your Property

Flickers, a type of woodpecker, are beautiful birds, but their presence on your property can lead to numerous issues. From damaging siding to creating noise disturbances, flickers can become a nuisance if not managed effectively. Below is a guide to help you address flicker-related problems while ensuring humane treatment.

Understanding the Problem with Flickers

  • Structural Damage: These birds often peck on wooden surfaces such as siding, eaves, and fences. Over time, this activity can compromise the integrity of these structures.
  • Noise Disturbances: The constant tapping noise produced by flickers can disrupt daily life and sleep patterns.
  • Pest Attraction: Holes created by flickers may become entry points for other pests like insects or rodents.

Understanding why flickers are targeting your property is essential. They may be searching for food (insects), marking territory, or building nests.

Humane Strategies for Managing Flickers

Managing flicker activity doesn’t have to involve harmful methods. Instead, focus on humane strategies that deter them from your property.

  1. Install reflective objects such as foil strips or mirrors near areas they frequent.
  2. Hang shiny ornaments or wind chimes that move with the wind to create an unwelcoming environment.
  3. Use predator decoys (e.g., owl statues) near impacted areas.
  4. Ultrasonic devices designed to deter birds may discourage flicker activity.
  5. Play recordings of predator sounds intermittently to keep them away.
  6. Cover vulnerable surfaces with hardware cloth or bird netting.
  7. Install metal sheeting over areas prone to pecking for added protection.
  8. Use bird spikes along ledges or other perching areas.
  9. Regularly inspect and repair any holes in wooden surfaces; this reduces nesting opportunities.
  10. Treat wood siding with pest-repellent finishes if insects are attracting the birds.

Long-Term Prevention Tactics

Strategy Description
Maintain Landscaping Trim nearby trees and shrubs that provide shelter for flickers.
Use Non-Toxic Repellents Spray eco-friendly bird repellents on surfaces to discourage pecking.
Provide Alternative Nesting Set up birdhouses in locations away from buildings as alternative habitats.

Proactive maintenance is key when dealing with persistent pests like flickers.

When to Seek Professional Help

If DIY methods fail to resolve the problem or damage becomes extensive, consider hiring a wildlife control expert who specializes in humane bird management techniques. Professionals can assess your situation and implement advanced solutions tailored specifically for your property.

By employing effective strategies and preventative measures, you can protect your home without harming these creatures while maintaining harmony between nature and human habitation.


Preparing Your Home for an Exterminator in Stuart, FL: A Step-by-Step Guide

Inspector or blue collar workers examine building walls. Outdoors. Repairmen, building inspectors, exterminators, engineers, insurance adjusters, or other blue collar workers examine a building/home's exterior walls. One holds a digital tablet, and they both wear protective face masks due to CoVID-19. team pest control stock pictures, royalty-free photos & images

Proper preparation not only enhances the success of the treatment but also helps to safeguard your family, pets, and belongings. This guide outlines a structured approach to readying your home for a pest control procedure.

Step 1: Communicate with Your Pest Control Professional

Before beginning any preparations, it is essential to have clear communication with your pest control provider.
– The type of treatment being applied (e. g. , sprays, baits, fumigation).
– Specific instructions for preparing each area of your home.
– Safety precautions you should follow post-treatment.

This information ensures that you comply with best practices and helps achieve optimal results.

Step 2: Declutter Key Areas

A clutter-free environment allows exterminators better access to areas where pests may hide or breed.
Under sinks: Clear out cleaning supplies or personal items beneath kitchen and bathroom sinks.
Corners and closets: Remove clothing or storage items from corners where pests are commonly found.
Storage rooms or basements: Organize these spaces to ensure easy access for treatment application.

Pro Tip: Use plastic bins instead of cardboard boxes, as cardboard often attracts pests like cockroaches and silverfish.

Step 3: Protect Kitchen Surfaces and Food Items

Kitchens are particularly vulnerable during pest control treatments due to their proximity to food sources.

  1. Remove all food items from countertops, pantry shelves, and drawers.
  2. Store food in sealed containers or move it out of the house temporarily.
  3. Cover kitchen counters and appliances with plastic sheeting if instructed by the pest control team.
  4. Empty cabinets near affected areas so that technicians can apply treatments thoroughly.

Step 4: Secure Pet Safety

Pets are sensitive to many chemicals used in pest control treatments, so ensuring their safety should be a priority.

Pet Type Preparation Tips
Cats & Dogs Relocate them temporarily during treatment (e.g., kennel or friend’s house).
Fish Tanks Cover tanks with plastic wrap; turn off air pumps temporarily if advised.
Birds Move cages outdoors or away from treated areas due to their chemical sensitivity.

Additionally, wash pet bedding after the procedure is complete to remove any residual chemicals.

Step 5: Address Problem Areas Outside Your Home

  • Trim back trees, shrubs, or plants that touch the exterior walls.
  • Remove stagnant water sources such as birdbaths or buckets.
  • Clear debris like leaves and mulch near foundations.
  • Repair holes in screens or seal cracks around doors and windows.

By removing outdoor attractants, you reduce the likelihood of reinfestation after treatment.

Final Checklist Before Treatment Day:

Task Done? (✔)
Communicated with service provider
Removed clutter from key areas
Safely stored food items
Covered surfaces as instructed
Prepared pets/detached sensitive items
Performed outdoor preparations

Being proactive in preparing will help ensure a smooth process while maintaining the safety of everyone involved within your household during this vital service process.

How to Choose the Best Stuart FL Pest Control Company for Effective Treatments

Proper preparation not only makes it easier for technicians to access problem areas but also enhances the effectiveness of the treatment, reduces health risks, and ensures long-term pest prevention. Below, we outline the reasons why preparation is essential as well as practical steps to take.

Why Proper Preparation Matters

  1. When spaces are decluttered and cleaned, pesticides can be applied directly to critical areas without obstruction.
  2. A clear workspace allows pest control professionals to inspect crevices, corners, and hidden spots thoroughly.
  3. Preparing your home reduces exposure risks for occupants by ensuring food items, dishes, and personal belongings are protected from chemical residues.
  4. Addressing sources of infestation before treatment helps eliminate pests more effectively and prevents them from returning after the service.
  5. A well-prepared home allows pest control professionals to focus on treating pests rather than moving clutter or working around obstacles.

Essential Steps for Preparing Your Home

  • Vacuum carpets and mop hard floors.
  • Eliminate crumbs on countertops or near appliances.
  • Dispose of garbage promptly.
  • Remove items from under sinks where leaks may attract pests.
  • Clear storage spaces that house cardboard boxes or stacks of paper.
  • Leave furniture a few inches away from walls to provide unobstructed access.
  • Store all food in sealed containers or remove it from the premises temporarily.
  • Cover kitchen appliances with plastic wrap if they cannot be moved.
  • Relocate pets such as cats, dogs, birds, or reptiles during the treatment process.
  • Store pet food in sealed containers away from treated areas.
  • Clean pet bedding or toys after treatment if exposed to chemicals.

Common Mistakes During Preparation

Mistake Why It’s Problematic
Not removing clutter Clutter provides hiding spots for pests.
Leaving food unprotected Food can become contaminated by chemicals.
Ignoring pet safety Pets may accidentally ingest harmful substances.

Long-Term Benefits of Adequate Preparation

  1. You reduce the chances of re-treatment being necessary in the future.
  2. Your household experiences fewer disruptions caused by lingering pests.
  3. You maximize return on investment in professional services through lasting results.

By following these guidelines meticulously, you create an optimal environment for effective pest eradication, fostering a safe and hygienic living space for you and your family.

Preparing Your Home with Stuart Pest Control: Tips for Effective Pest Management

One of the most important steps in this process involves clearing clutter and moving furniture. This helps pest control professionals access key areas, apply treatments efficiently, and minimize hidden spots where pests can thrive.

Why Clearing Clutter is Essential

Cluttered spaces provide hiding spots for pests, allowing them to avoid detection and treatment. By removing unnecessary items, you reduce the number of breeding grounds and make it easier to spot problem areas.

  • Improves Treatment Coverage: Open spaces ensure that pest control agents can reach every corner where pests might hide.
  • Reduces Reinfestation Risk: Pests often nest in cluttered areas. Decluttering minimizes future nesting opportunities.
  • Speeds Up Treatment Process: A cleaner, more organized space allows pest control professionals to work more efficiently.

Step-by-Step Guide to Decluttering

  1. Start with High-Traffic Areas
    Clear frequently used spaces like living rooms, kitchens, and bedrooms first since these are the most common places for infestations.
  2. Store loose items such as shoes, toys, or clothing in sealed plastic bins or bags.
  3. Remove unnecessary papers, cardboard boxes, or other materials that could harbor pests.
  4. Dispose of Trash Properly
    Ensure all garbage is removed from the home before treatment begins to eliminate potential food sources for insects or rodents.
  5. Empty Storage Areas
    If possible, clean out storage spaces such as closets or under beds where pests may be hiding.

Moving Furniture for Better Access

Large furniture pieces can block access to important areas during a pest control service. Moving these items facilitates thorough application of treatments and ensures no spots are overlooked.

Key Areas That Require Furniture Movement:
  • Along baseboards
  • Corners of rooms
  • Underneath heavy furniture (e. g.
  • Near windowsills or doorframes
Recommended Actions:
  • Shift Furniture Away from Walls: Move couches, beds, cabinets, and dressers 2–3 feet away from walls to give technicians room to work.
  • Elevate Small Items Off the Floor: For lighter furniture (chairs or end tables), consider placing them temporarily on top of heavier pieces.
  • Use Sliders for Heavy Pieces: If moving large furniture manually isn’t feasible due to weight constraints, use felt pads or sliders to make the process easier.

Tips for Staying Organized During Preparation

To make this step less overwhelming:

– Tackle one room at a time instead of addressing the entire house at once.

– Label packed boxes with their content and designated room so you can easily reorganize after treatment.

– Take photos before moving items if you’re worried about forgetting their original arrangement.

Item Type Action Required Suggested Storage Option
Loose clothing Seal in airtight plastic bags Closet shelves
Food containers Remove from countertops Kitchen pantry
Books & magazines Pack into boxes Garage or attic
Pet toys & bedding Wash thoroughly; store temporarily Away from sprayed areas

By taking time to clear clutter and arrange furniture properly before your pest control appointment, you are setting up your home for a more effective treatment. These actions ensure that every corner is accessible while minimizing any risks related to untreated hiding spots for pests.

Effective Pest Removal Stuart FL: Tips for Preparing Your Home

Inspectors or blue collar workers examine building wall, foundation. Outdoors. Repairmen, building inspectors, exterminators, engineers, insurance adjusters, or other blue collar workers examine a building/home's exterior wall and foundation. One wears a red hard hat and clear safety glasses and holds a clipboard. The other helps check foundation's integrity and holds a digital tablet. team pest control stock pictures, royalty-free photos & images

Proper preparation is essential to ensure that pest control treatments work effectively. One of the most critical steps in this process is clearing clutter and moving furniture to provide access to target areas. This not only helps pest control professionals apply treatments efficiently but also prevents pests from finding hiding spots during or after the service. Below are practical tips and steps on how to clear your home for a successful pest control session.

Why Clearing Clutter Is Important

Pests thrive in areas where they can hide and remain undisturbed. Clutter, such as stacks of papers, cardboard boxes, or piles of laundry, provides excellent shelter for pests like cockroaches, ants, rodents, and spiders.

  • Better Accessibility: Pest control technicians need unobstructed access to key areas like baseboards, corners, behind appliances, and under furniture.
  • Improved Treatment Coverage: The fewer obstructions there are, the more effective treatments will be at reaching hidden pests.
  • Reduced Risk of Reinfestation: Decluttering eliminates potential nesting spots that pests could return to after treatment.

Steps to Clear Clutter

  1. Discard old newspapers, cardboard boxes, magazines, or any unnecessary objects that tend to pile up over time.
  2. Store seasonal items or unused belongings in sealed plastic containers instead of open boxes.
  3. Keep clothing off the floor by using hangers or placing items in sealed bins.
  4. Ensure shoes are stored neatly rather than left scattered on the ground.
  5. Remove unnecessary items from kitchen counters and shelves where pests like ants might forage for food.
  6. Avoid overstocking pantry shelves; organize food items into airtight containers.

Moving Furniture Before Pest Control

In addition to decluttering your space, it’s crucial to move certain pieces of furniture so that technicians can access hard-to-reach areas where pests may reside.

  • Move Large Furniture Away from Walls: Shift sofas, beds, dressers, and bookshelves at least 6–12 inches from walls so professionals can treat along baseboards effectively.
  • Focus on Key Areas: Concentrate on rooms where pest activity is highest (e. g. , kitchens, bathrooms). These spaces often require more extensive treatment coverage around appliances and cabinets.
  • Protect Delicate Items: If moving fragile furniture or décor isn’t feasible due to size or weight constraints, inform the pest control provider so they can work around them safely.

Checklist for Clearing Clutter & Moving Furniture

Task Completed (✔) Notes
Remove clutter from floors Focus on problem areas
Organize closets/storage Use sealed plastic bins
Clear kitchen counters/shelves Store food in airtight containers
Move furniture away from walls At least 6–12 inches
Secure delicate/fragile items Inform technician if needed

By decluttering your home thoroughly and repositioning furniture as necessary beforehand, you create an environment that allows pest control services to be applied efficiently with maximum effectiveness against infestations. Following these steps also helps maintain long-term prevention by reducing hiding spots for future pests.

Securing Food and Protecting Kitchen Items During a Pest Control Procedure

Pest control procedures often involve the application of chemical solutions, sprays, or other substances that can contaminate food if not stored correctly. This guide will provide you with essential tips to protect your kitchen and its contents during a pest control service.

Why Securing Food Is Important

Pesticides, while effective in eliminating infestations, can pose health risks if ingested or inhaled in significant quantities. Contaminated food or utensils could lead to severe health effects such as nausea, headaches, or long-term exposure-related illnesses. To avoid these risks, it’s vital to secure all consumables and kitchen tools properly before the treatment begins.

Steps to Secure Your Kitchen

  1. Place all perishable and non-perishable food into airtight containers made of plastic or glass.
  2. If possible, move the containers into cupboards, refrigerators, or pantries that won’t be treated.
  3. For large appliances like refrigerators or freezers that cannot be moved, ensure they remain tightly sealed during the procedure.
  4. Remove all spices, oils, coffee makers, toasters, and other small appliances from countertops.
  5. Store these items in cabinets or drawers that are unlikely to come into contact with pesticide sprays.
  6. Dispose of any opened food packages left on countertops as they may become contaminated.
  7. Seal semi-used items like sugar bags or flour packets in resealable bags before storing.
  8. Use plastic wrap or cloths to cover large appliances like microwaves and ovens if they cannot be removed.
  9. Dispose of garbage prior to treatment day as pests can hide in trash bins.
  10. Wash the bins thoroughly with soap and water after removing waste.

Checklist for Kitchen Preparation

Task Action
Store perishables Use airtight containers; move them into pantries/refrigerators
Remove countertop items Clear coffee makers, spices; store them securely
Cover exposed surfaces Place covers over large appliances
Seal semi-used foods Put opened packages (e.g., snacks) in resealable bags
Empty trash Dispose of waste; clean the trash bin thoroughly

Additional Tips for Kitchen Safety

  • Avoid preparing meals on your counters until 24–48 hours after treatment has been completed unless advised otherwise by your pest control professional.
  • After treatment is complete, wipe down all surfaces with warm water and mild detergent before restocking your kitchen.

Taking adequate precautions not only provides peace of mind but also ensures that no harmful substances compromise the safety of your household’s consumables. Following these steps carefully will help maintain a hygienic environment throughout the pest control process while ensuring effective results from the treatment itself.

Essential Steps to Safeguard Your Pets Before a Pest Control Treatment

While pest control services are designed to target unwanted pests, some products and procedures may pose risks to animals if proper precautions are not taken. Below is a comprehensive guide to ensure your furry, feathered, or scaly companions remain safe during and after a pest control service.

Understand the Pest Control Products Being Used

Before the treatment begins, ask your pest control provider for detailed information about the products they will use. Understanding their toxicity levels and the appropriate precautions can help you make informed decisions.

  • Low-Toxicity Products: If possible, request pet-safe or eco-friendly solutions.
  • Labels and Warnings: Review product labels or Material Safety Data Sheets (MSDS) for specific risks to animals.
  • Reentry Timing: Confirm how long it will take before it’s safe for pets to return to treated areas.

Remove Pets From Treated Areas

One of the simplest ways to protect pets is by keeping them away from areas being treated.

  1. If feasible, arrange for your pets to stay with a friend, family member, or at a boarding facility during the treatment process.
  2. For smaller animals like birds or hamsters that are sensitive to airborne chemicals, consider moving them outside of the home entirely during spraying or fumigation.
  3. If relocation isn’t an option, confine pets in untreated areas of your home with adequate ventilation and food/water supplies.

Remove Pet Belongings

Pets’ belongings can absorb chemicals used during pest control treatments if not properly handled.

  • Wash all pet bedding, blankets, and toys in hot water if possible.
  • Store items such as food bowls, water dishes, leashes, litter boxes, and scratching posts in sealed containers away from treated zones.
  • After treatment is complete and surfaces are dry, clean any affected belongings before returning them to their original places.

Special Considerations for Specific Animals

Animal Type Precautionary Measures
Dogs & Cats Ensure they avoid licking or walking on treated surfaces until fully dry.
Birds Move cages far from treated areas as they are highly sensitive to airborne chemicals.
Fish & Aquatic Pets Cover tanks securely with plastic wrap and turn off air pumps during spraying activity.
Reptiles Relocate reptiles temporarily due to their sensitivity toward environmental changes.

Post-Treatment Care

  1. Wipe down non-treated surfaces that may have come into contact with chemicals.
  2. Vacuum floors and upholstery thoroughly once cleared by your pest professional.
  3. Monitor your pet closely for signs of distress (e. g., drooling, lethargy) post-exposure; consult a veterinarian immediately if symptoms appear.

Taking these proactive measures not only ensures effective pest control but also protects your beloved pets from unnecessary risks associated with chemical exposure. By working closely with your exterminator and following safety guidelines tailored specifically for animals in your care, you can maintain a safe environment while addressing pest concerns effectively.

Preparing the Exterior of Your Home for Maximum Pest Control Effectiveness

Pests often thrive in outdoor spaces before making their way indoors, so addressing external areas can prevent future infestations. Here’s a comprehensive guide to help you effectively prepare your home’s exterior.

Inspect and Eliminate Standing Water Sources

Standing water is a breeding ground for many pests, including mosquitoes.

  • Empty any containers that collect water, such as buckets, flowerpots, or old tires.
  • Clean gutters and ensure they are free from debris.
  • Check for leaks or pooling water near air conditioning units or outdoor faucets.

Maintain Landscaping and Trim Vegetation

Overgrown plants and dense vegetation provide shelter to pests like ants, rodents, and spiders.

  • Trim shrubs and bushes: Ensure all vegetation is at least 1–2 feet away from the walls of your home.
  • Mow lawns: Keep grass neatly cut to reduce hiding spots for insects.
  • Remove mulch near foundations: Replace organic mulch with alternatives like rocks or gravel to deter pests from nesting too close.

Seal Outdoor Entry Points

Pests often enter homes through cracks and small openings.

Common Entry Areas Recommended Action
Cracks in foundation Use caulk or concrete patching material
Window frames Apply weather stripping or sealant
Doors Install door sweeps or thresholds
Roof vents Cover with fine mesh screens

Addressing these entry points will help prevent pests from re-entering after treatment.

Clear Structural Debris

Clutter around the exterior can attract various pests.

  • Remove piles of wood, leaves, or debris that can serve as nesting sites.
  • Store firewood at least 20 feet away from the house on an elevated rack.
  • Dispose of unused items like broken furniture or discarded appliances promptly.

Protect Outdoor Furniture and Equipment

  1. Covering grills, patio furniture, and children’s toys with plastic sheets.
  2. Moving items closer to the center of patios or yards if possible.
  3. Cleaning up food residue on grills or picnic tables that may attract pests.

Secure Exterior Garbage Bins

Garbage bins are a major attractant for rodents and other scavengers.

  • Using bins with tight-fitting lids.
  • Cleaning bins regularly to remove odors.
  • Keeping bins at least 10 feet away from entrances wherever feasible.

Properly preparing the exterior of your home lays the foundation for successful pest control treatments. By addressing potential problem areas outside your house, you can enhance results while preventing reinfestation over time.


Tips from an Exterminator Stuart FL: Common Places You Forget to Clean That Attract Pests

Multi-ethnic team of repairmen at customer's front door. African descent and Caucasian repairmen or blue collar/service industry workers make service/house call at customer's front door. Man foreground gives customer her invoice to sign as other worker holds ladder in background. Inspectors, exterminators, electricians. Red brick home. team pest control stock pictures, royalty-free photos & images

Pests are often drawn to areas that are neglected during routine cleaning. These overlooked spaces in your home can become thriving environments for insects, rodents, and other unwelcome intruders. Identifying and addressing these areas can significantly reduce the risk of infestation. Below, we’ll explore some of the most commonly forgotten places and provide actionable tips to keep pests at bay.

Forgotten Areas That Attract Pests

  1. The spaces beneath your refrigerator, stove, and dishwasher often go unnoticed during cleaning. Food crumbs and moisture can accumulate here, providing an ideal environment for pests like cockroaches or ants.
  2. Solution: Move appliances periodically to clean underneath them thoroughly.
  3. Heavy furniture pieces such as couches and bookshelves are rarely moved during regular cleaning routines. Dust accumulation in these areas can attract dust mites and spiders.
  4. Solution: Use a vacuum cleaner with a hose attachment to clean behind furniture every few months.
  5. Kitchen sinks, bathroom drains, and even outdoor gutters can harbor food particles, organic matter, or stagnant water—perfect breeding grounds for pests like drain flies or mosquitoes.
  6. Solution: Regularly flush drains with boiling water or a natural mixture of baking soda and vinegar.
  7. Basements, attics, garages, and closets are often cluttered with boxes or unused items where pests like rodents or silverfish thrive unnoticed.
  8. Solution: Organize storage spaces using airtight containers and ensure regular decluttering.
  9. While taking out the trash may seem sufficient, residue at the bottom of bins is commonly overlooked and can attract flies or ants.
  10. Solution: Wash trash bins regularly with soap and disinfectant.

Why These Places Are Vulnerable

Area Attracted Pest Types Primary Cause
Under appliances Cockroaches, ants Food crumbs
Behind furniture Spiders Dust accumulation
Drains Drain flies Organic residue
Storage areas Rodents, silverfish Cluttered spaces
Trash bins Flies Residual waste

Tips for Consistent Maintenance

  • Develop a cleaning checklist that includes less obvious locations.
  • Schedule deep cleaning sessions quarterly to address hard-to-reach spots.
  • Minimize clutter around your home to reduce hiding places for pests.
  • Inspect entry points around doors, windowsills, and vents frequently as uncleaned areas near these spots can attract invaders.

Regularly maintaining all parts of your home—even those out of sight—can make it far less inviting for pests while improving overall cleanliness. A proactive approach is key when dealing with pest prevention strategies in these overlooked zones.

How Stuart FL Pest Control Company Can Help You Handle Stubborn Insects

Pests can be persistent, and some insects seem nearly impossible to eliminate no matter how hard you try. Understanding why certain insects are so difficult to control is essential for developing effective strategies to handle them. Here, we explore the reasons behind their resilience and practical steps you can take.

Why Are Some Insects So Hard to Get Rid Of?

  1. Rapid Reproduction Cycles
    Many insects, such as cockroaches or fruit flies, reproduce at an astonishing rate. A single female cockroach, for instance, can produce hundreds of offspring within a few months. This rapid reproduction means that even after you address part of the infestation, new generations may still emerge.
  2. Adaptability and Resistance to Chemicals
    Over time, some insect species have adapted to pesticides and become resistant to commonly used chemicals. Mosquitoes are a prime example; they’ve developed resistance to several insecticides due to widespread use over decades.
  3. Hidden Habitats
    Certain insects hide in places that are difficult for humans to access or notice, such as small cracks in walls or deep within furniture upholstery. Bed bugs are notorious for this behavior, making them one of the hardest pests to eradicate.
  4. Survival Mechanisms
    Many pests have evolved survival mechanisms that help them evade extermination efforts:
  5. Ants often split their colonies when threatened (a process called “budding”), creating multiple infestations.
  6. Fleas enter dormant stages under unfavorable conditions until they detect suitable conditions again.
  7. Human Behavior and Habitats
    The way we live can unintentionally contribute to pest infestations:
  8. Leaving out food crumbs provides an easy source of nourishment.
  9. An accumulation of clutter offers ample hiding spaces.

Effective Strategies for Handling Persistent Insects

  • Identifying the Pest Properly Proper identification is a critical first step. Each species requires specific treatment methods tailored to its biology and behavior.
  • Target All Life Stages Use products or strategies that address eggs, larvae/nymphs, and adults simultaneously:
  • For fleas: Wash pet bedding in hot water while using flea treatments on pets.
  • For cockroaches: Use baits that kill not just adults but also disrupt reproduction cycles.
  • Combine Chemical and Non-Chemical Approaches A mix of chemical treatments (such as sprays) with non-chemical methods (like traps or sealing entry points) increases success rates:
  • Bed bugs: Pair heat treatments with insecticide applications.
  • Ants: Seal cracks in walls alongside applying bait traps.
  • Maintain Consistent Cleaning Practices While cleaning alone might not completely resolve infestations, it helps reduce attractants like food residues:
  • Vacuum carpets often.
  • Remove clutter where pests may hide.
  • Hire Professional Pest Control Services If home remedies fail or the infestation grows too large: | Service Type | Benefits | |———————–|——————————————-| | Extermination | Eliminates current populations entirely | | Preventive Treatments | Reduces chances of future outbreaks |

Preventing Reinfections

  • Seal gaps around windows, doors, and pipes.
  • Store food in airtight containers.
  • Keep outdoor areas free from standing water (to deter mosquitoes).
  • Regularly inspect your home for signs of pests returning.

By understanding why certain insects are challenging to eliminate and using targeted strategies based on their biology and behavior, you can take control of your space effectively over time.

Effective Pest Removal Stuart FL: Identifying Tiny White Bugs on Plants and Solutions

Tiny white bugs on plants can cause significant damage to your garden, houseplants, or crops if left untreated. These pests are often small enough to go unnoticed until their populations grow, leading to visible harm. Understanding what these pests are, how they affect plants, and the appropriate control measures can help protect your plants.

Common Tiny White Bugs Found on Plants

  • Mealybugs: These pests look like small cotton balls and cluster around plant stems and leaves. They suck sap from the plant and excrete a sticky substance called honeydew that attracts mold.
  • Whiteflies: Tiny flying insects with white, dust-like wings that feed on plant sap. They reproduce quickly, making infestations challenging to control.
  • Spider Mites: Though not technically bugs but arachnids, spider mites are often identified by their fine webbing. Some species appear pale or white in color.
  • Aphids (White Varieties): While aphids come in many colors, certain species appear white or light green. They target tender new growth and deplete a plant’s nutrients.
Pest Appearance Damage Caused Common Hosts
Mealybugs Cottony clusters Stunted growth; sticky residue Indoor/outdoor plants
Whiteflies Tiny white-winged insects Yellowing leaves; leaf drop Vegetables; ornamentals
Spider Mites Pale with webbing Speckled leaves; silk webs Houseplants; shrubs
Aphids Pear-shaped, some white Curled leaves; slow growth Roses; fruit trees

Why Are Tiny White Bugs Harmful?

  1. Sap Feeding: Many of these insects feed directly on plant sap, depriving the host of essential nutrients.
  2. Transmission of Diseases: Some bugs carry plant viruses as they move between plants.
  3. Encouragement of Mold Growth: Honeydew secretion creates an ideal environment for sooty mold to thrive.

Effective Pest Control Solutions

  1. For small infestations, gently wipe affected areas using a cloth soaked in soapy water or an alcohol solution (70% isopropyl alcohol diluted with water).
  2. Prune heavily infested parts to prevent further spread.
  3. Introduce beneficial insects like ladybugs or lacewings that prey on mealybugs and aphids.
  4. Use neem oil sprays or insecticidal soaps regularly for organic pest management.
  5. Apply horticultural oils or systemic insecticides designed for specific pest types according to product instructions.
  6. Avoid overuse of chemical pesticides as this may harm beneficial insects in your garden.
  7. Maintain proper spacing between plants to improve air circulation and reduce humidity levels where pests thrive.
  8. Keep soil free from debris that may harbor eggs or larvae.
  9. Regularly inspect the undersides of leaves for signs of infestation such as speckles or nymphs.
  10. Check surrounding areas like pots or garden beds where eggs might be laid.

Preventing Future Infestations

  • Always quarantine new plants before integrating them into your collection.
  • Clean gardening tools after each use to avoid spreading harmful organisms between plants.
  • Ensure proper watering practices—both overwatering and underwatering create stress conditions that make plants more vulnerable to pests.

By recognizing early signs of infestation and implementing an integrated pest management plan, you can ensure the health and longevity of your plants while avoiding long-term damage caused by tiny white bugs. Adopting environmentally friendly practices also helps maintain balance within your ecosystem while addressing pest problems effectively.

Why You Keep Finding Cobwebs Even After Thorough Cleaning and How to Prevent Them

Cobwebs are a common nuisance in many homes, and they often seem to reappear even after a deep cleaning. These webs are not just unsightly but may also indicate an underlying pest problem. Understanding why cobwebs keep forming and implementing proactive strategies can help you manage and prevent them effectively.

Why Cobwebs Keep Reappearing

  1. Active Spider Presence
    Spiders are the primary culprits behind cobweb formation. Even if you remove the webs, as long as spiders remain active in your home, they will continue spinning new ones.
  2. Cluttered Spaces
    Areas with clutter, such as basements, attics, or storage rooms, provide ideal hiding spots for spiders to thrive undetected.
  3. Inaccessible Cleaning Areas
    Corners of ceilings, behind furniture, or high shelves that are hard to reach during regular cleaning often become prime locations for cobweb formation.
  4. Presence of Insects
    Spiders feed on other insects, so if your home has an insect infestation (e.g., flies or ants), it creates a food source that attracts spiders.

Steps to Prevent Cobweb Formation

To reduce the recurrence of cobwebs in your living space, focus on both preventing spider infestations and keeping your home clean and organized.

  1. Dust every corner of your home frequently, including ceilings and wall corners.
  2. Use a vacuum cleaner with an extension wand for hard-to-reach areas.
  3. Pay attention to less obvious locations such as air vents and window sills.
  4. Store items in sealed plastic containers rather than cardboard boxes (spiders often hide in cardboard).
  5. Limit unnecessary clutter in basements or garages where spiders tend to nest.
  6. Inspect for cracks or gaps around windows, doors, pipes, and vents.
  7. Use caulk or weatherstripping to seal these openings so spiders cannot enter easily.
  8. Reduce outdoor lighting near windows and doors since lights attract flying insects that may serve as prey for spiders.
  9. Switch to yellow “bug lights,” which are less attractive to insects.
  10. Focus on controlling broader pest issues by addressing food sources or moisture buildup indoors.

Natural Spider Deterrents

  • Essential Oils: Peppermint oil mixed with water can be sprayed around entry points or areas prone to spider activity.
  • Vinegar Solution: A mixture of white vinegar and water works well as a safe deterrent for both spiders and other pests.
  • Citrus Peels: Spiders dislike citrus scents; leaving orange or lemon peels near windowsills can discourage them from settling indoors.
Natural Deterrent How It Works Application Area
Peppermint Oil Strong scent masks pheromones Around entry points
Vinegar Solution Acidic properties disrupt spider behavior Windows & baseboards
Citrus Peels Spiders avoid citrus fragrance Corner crevices

Professional Pest Control Solutions

  • Experts can identify hidden infestations more effectively than DIY approaches.
  • Licensed professionals use targeted treatments that address both the root cause (insects) and secondary issues (spiders).
  • Many services offer preventative maintenance plans tailored to keep pests from returning over time.

By taking these steps seriously—combining consistent cleaning habits with preventive measures—you can significantly reduce cobweb occurrences while fostering a healthier indoor environment overall.

The Importance of Sealing Entry Points Before Winter to Keep Pests Out

Exterminators in warehouse spraying pesticides with sprayer Exterminators in warehouse spraying pesticides with sprayer team pest control stock pictures, royalty-free photos & images

As temperatures drop, pests often seek refuge inside homes and buildings to escape the cold. Properly sealing entry points is a critical step in preventing infestations during the winter months. Small gaps, cracks, and openings around your property can provide easy access for rodents, insects, and other unwanted visitors. Here’s why sealing entry points is essential and how to do it effectively.

Why Sealing Entry Points Matters

  1. Prevention of Infestations: Many pests, such as mice, rats, cockroaches, and spiders, look for warmth during colder seasons. If your property has accessible openings, it becomes an ideal shelter.
  2. Health Risks: Pests can carry bacteria and viruses harmful to humans. For instance:
  3. Rodents spread diseases like hantavirus or salmonella.
  4. Cockroaches trigger allergies and asthma symptoms.
  5. Property Damage: Rodents chew on wires, insulation, and woodwork. Insects like termites can damage structural integrity over time.
  6. Reducing Pest Control Costs: Preventative measures such as sealing gaps are more cost-effective than addressing a full-scale infestation.

Common Entry Points for Pests

Area Typical Issues
Windows & Doors Gaps around frames or under doors
Walls Cracks in brickwork or siding
Attics Unsealed vents or roofline gaps
Basements Foundation cracks or poorly sealed windows
Utility Openings Gaps around pipes, cables, or vents

Steps to Seal Entry Points Effectively

  1. Walk around your home’s exterior and interior.
  2. Look for visible cracks or openings in walls, doors, windows, foundations, and roofs.
  3. Use expanding foam sealant for large cracks or voids.
  4. Metal mesh combined with caulk works well for larger utility pipe openings.
  5. Attach door sweeps at the base of exterior doors to close off gaps where pests might enter.
  6. Apply weatherstripping tape along window frames.
  7. Use caulk to seal any gaps between the window frame and wall.
  8. Replace torn window screens with pest-proof versions (e.g., metal mesh).
  9. Cover attic vents with fine wire mesh to block insects without compromising airflow.
  10. Use epoxy crack fillers for minor foundation issues.
  11. Consult a professional if you suspect significant structural damage.
  12. Trim shrubs and tree branches near your home’s exterior walls.
  13. Remove leaf piles that could harbor pests close to entry points.

Additional Tips for Winter Pest Prevention

  • Store firewood at least 20 feet from your house to deter termites and ants.
  • Keep trash bins tightly sealed with secure lids.
  • Inspect deliveries (like holiday packages) before bringing them indoors as they could harbor insects like spiders or cockroaches.

By taking preventative measures now through proper sealing techniques, you not only reduce the risk of pest invasions but also create a healthier living environment throughout the winter season—and beyond—without relying heavily on reactive pest control methods later on.

How Stuart Pest Control Can Help You Eliminate Bugs in Your Car

Pests in your car can be an unsettling experience. Not only do they make driving uncomfortable, but they can also damage the interior and even pose health risks. While finding bugs in a vehicle may seem unusual, it’s more common than you might think, especially if certain conditions attract them. Here’s why pests might invade your car and steps you can take to eliminate them effectively.

Common Reasons for Bugs in Your Car

  • Leftover Food or Trash: Crumbs or spills from snacks create an inviting environment for insects like ants, cockroaches, and flies.
  • Clutter: Items stored in cars over time—such as papers, clothing, or even reusable shopping bags—can serve as hiding places for pests.
  • Outdoor Parking Near Vegetation: Parking under trees or near shrubs increases the likelihood of insects entering your vehicle.
  • Moisture Build-Up: Leaks or condensation inside your car create a humid environment that attracts pests seeking water sources.
  • Open Entry Points: Small gaps around windows, doors, or vents are easy access points for bugs.

Steps to Eliminate Bugs from Your Car

  1. Remove all trash and clutter from seats, floor mats, cup holders, and storage compartments.
  2. Use a vacuum to thoroughly clean carpets, upholstery, and crevices where food particles may have fallen.
  3. Wash floor mats with soap and water to remove any sticky residue that might attract insects.
  4. Identify Specific Pests
    Different types of bugs require different approaches:
  5. For ants: Look for a trail leading into your car and address the source outside (e.g., nearby ant colonies).
  6. For cockroaches: Use bait traps specifically designed for roaches inside your car overnight.
  7. For flies or mosquitoes: Check for standing water within the vehicle that may serve as breeding grounds.
  8. Disinfect Surfaces
    After vacuuming, wipe down all hard surfaces with an antiseptic cleaner to eliminate any lingering food smells.
  9. Seal Potential Entry Points
    Inspect weather stripping around doors and windows for wear and tear that could allow pests into your vehicle. Replace damaged seals promptly.
  10. Use Natural Deterrents or Pest Control Products
    Some effective options include:
  11. Sprinkling diatomaceous earth under seats (safe for humans but harmful to many insects).
  12. Using essential oil sprays like peppermint or eucalyptus to repel pests naturally.
  13. Park Strategically
    Avoid parking near garbage bins or dense vegetation when possible.

Preventive Measures

Step Action
Regular Cleaning Vacuum weekly; remove trash immediately after use
Food-Free Policy Avoid eating inside the car whenever possible
Monitor Moisture Fix leaks promptly; use dehumidifiers if necessary
Routine Inspections Check under seats and in lesser-used compartments periodically

By maintaining a clean environment inside your car and taking preventive measures regularly, you can significantly reduce the chances of dealing with pest infestations while on the road.

What Is Insect Molting and Its Role in Pest Infestations

Insect molting is a fascinating yet critical process in the life cycle of various pests. It plays a significant role in pest infestations, influencing both their growth and survival. Understanding this biological process can help homeowners and pest control professionals develop more effective strategies to combat infestations.

What Is Molting?

Molting, also known as ecdysis, is the process through which insects shed their exoskeletons to grow or transition into another life stage. Because an insect’s exoskeleton does not stretch or expand, molting is essential for its development. This process occurs multiple times throughout an insect’s life cycle, particularly during larval or nymph stages.

  • Apolysis: The separation of the old exoskeleton from the underlying epidermis.
  • Ecdysis: The shedding of the old exoskeleton.
  • Sclerotization: The hardening and darkening of the new exoskeleton after it has been fully formed.

Why Molting Makes Insects Hard to Control

  • Rapid Growth Rates: During molting cycles, insects grow quickly, leading to exponential population increases if left unmanaged.
  • Resistance to Control Methods: Some pests develop resistance to chemical pesticides following a molt since their new exoskeleton may be less susceptible to previously applied treatments.
  • Hidden Stages: Insects often hide during molting because they are vulnerable without their hardened exoskeletons, making detection and elimination more difficult.

Pests That Undergo Molting

Pest Lifecycle Stages Requiring Molting Common Issues Caused by Infestation
Cockroaches Nymph to adult Disease transmission, allergens
Bed Bugs Nymph stages Painful bites, infestation spread
Fleas Larvae to pupae Skin irritation for pets & humans
Spiders Juvenile stages Web formation

How Understanding Molting Can Improve Pest Control Efforts

  1. Pesticides tend to be most effective against certain pests during specific stages of their lifecycle (e.g., post-molt when their new exoskeleton is still soft). Applying treatments during these periods ensures maximum impact.
  2. Insect growth regulators (IGRs) are chemicals designed to disrupt normal development processes like molting. By preventing pests from transitioning between life stages, IGRs can reduce infestations effectively over time.
  3. During molts, insects seek secluded areas for protection. Identifying these hiding spots—such as cracks in walls or undersides of furniture—can improve inspection efficiency and treatment outcomes.
  4. Since many insects molt multiple times before reaching adulthood, long-term monitoring is essential even after initial treatments have been applied.

Understanding insect molting not only sheds light on why infestations persist but also highlights opportunities for smarter pest control strategies that reduce populations more efficiently over time while minimizing risks to humans and pets.

What Is Insect Molting and Its Role in Pest Infestations

Insect molting is a fascinating yet crucial biological process that directly impacts pest infestations in homes and businesses. Understanding this process can provide valuable insights into pest behavior and help develop more effective control strategies.

What Is Insect Molting?

Molting, or ecdysis, is the process by which insects shed their exoskeleton to grow or transition into a new life stage. Unlike vertebrates, insects have a rigid exoskeleton that cannot expand as they grow. To continue developing, they periodically shed their old exoskeleton and form a new one.

The molting process typically involves three stages: 

  1. Apolysis: The separation of the old exoskeleton from the underlying epidermis.
  2. Ecdysis: The shedding of the old exoskeleton. 
  3. Sclerotization: The hardening of the new exoskeleton.

How Does Molting Relate to Pest Infestations?

  • Rapid Population Growth: Many pests molt multiple times during their lifecycle. For instance:
  • Cockroaches molt 6-13 times before reaching maturity.
  • Bed bugs go through five nymphal stages, each requiring a blood meal before molting.

This ability to molt allows these insects to quickly reproduce and grow in number if not controlled effectively.

  • Increased Vulnerability During Molting: During ecdysis, insects are soft-bodied and more vulnerable to predators or environmental hazards like pesticides.
  • Resistance Development: Some chemicals target specific developmental stages. Pesticides that disrupt molting (e.g., insect growth regulators) are particularly effective for managing long-term infestations by preventing insects from reaching maturity or reproducing.

Signs of Molting Activity in Your Space

Pest Type Signs of Molting
Cockroaches Small shed skins resembling translucent shells near hiding spots like cabinets or appliances
Bed Bugs Moults near mattress seams, furniture joints, or cracks in walls
Termites Discarded wings (from reproductive termites) combined with frass (wood-like droppings)
Ants Exuviae (shed skins) near nesting areas

Paying attention to these signs can help detect infestations early.

Effective Pest Control Strategies Targeting Molting

  1. IGRs disrupt hormone production critical for successful molting.
  2. Commonly used against cockroaches, fleas, and mosquitoes.
  3. Knowing whether pests are nymphs or adults helps determine appropriate measures (e.g., physical removal vs pesticide application).
  4. Remove shed skins promptly as they can attract other pests like beetles seeking protein sources.
  5. Prevent access for immature stages looking for favorable conditions to molt safely indoors.

By combining meticulous observation with professional pest control solutions when required, property owners can effectively minimize infestations driven by insect molting processes while creating less hospitable environments for future outbreaks.


Understanding Why an Exterminator Stuart FL is Essential for Monthly Pest Control

Multi-ethnic team of repairmen at customer's front door. African descent and Caucasian repairmen or blue collar/service industry workers make service/house call at customer's front door. Man foreground shakes customer's hand and other worker holds ladder in background. Inspectors, exterminators, electricians. Red brick home. team pest control stock pictures, royalty-free photos & images

Pest control is not just a reactive solution but an essential preventive measure for both residential and commercial spaces. Monthly pest control services offer a comprehensive approach to keeping your property pest-free, fostering healthier environments, reducing risks of property damage, and ultimately saving time and money in the long run.

Key Benefits of Monthly Pest Control

  1. Regular pest control treatments stop infestations before they start.
  2. Maintenance ensures that pests do not have the opportunity to establish colonies on your property.
  3. Pests such as rodents, cockroaches, and ants can carry bacteria and allergens harmful to humans.
  4. Regular treatments minimize exposure to these health risks.
  5. Waiting until an infestation occurs often results in higher costs for extermination and repairs.
  6. Monthly maintenance reduces the likelihood of severe outbreaks that demand extensive treatment.
  7. Termites, carpenter ants, or rodents can cause structural damage to properties over time.
  8. Consistent monitoring protects against long-term damage that could affect your building’s value.

How Monthly Pest Control Works

Service Step Description
Inspection Thorough examination of the property for potential problem areas or pests
Treatment Application of environmentally safe products to eliminate current threats
Preventative Action Sealing gaps, clearing debris, or addressing moisture issues
Monitoring Ongoing tracking of pest activity using traps or other monitoring tools

Why Homes Benefit from Monthly Pest Control

  • Avoid surprises: Pests like ants or rodents often emerge as seasons change; regular treatments address seasonal variations.
  • Protect your family: Reducing exposure to insects that bite or sting enhances safety within living spaces.
  • Maintain sanitation: Kitchens and pantries remain cleaner without invaders contaminating food supplies.

Advantages for Businesses

  • Compliance with Health Codes: Pest-free environments meet regulatory standards required in industries such as hospitality or food service.
  • Customer Satisfaction: A visible pest problem can tarnish reputations instantly; prevention keeps customers happy.
  • Inventory Protection: Rodents and insects can destroy inventory stored in warehouses by chewing through packaging materials.

By investing in monthly services tailored to specific needs, both homeowners and business owners can enjoy peace of mind knowing their spaces are protected year-round from unwanted guests. Recognizing these benefits early leads to healthier living conditions and smoother business operations over time.

How Stuart Pest Control Ensures Long-Term Protection

Pests can be persistent and damaging, causing significant harm to both residential and commercial properties if left unchecked. Implementing ongoing pest control measures is vital for ensuring long-term protection and maintaining a safe, hygienic environment. This practice goes beyond simple pest treatment by focusing on prevention, early intervention, and consistent management.

Avoid Infestations with a Trusted Stuart FL Pest Control Company

  • Structural Damage: Termites, carpenter ants, and rodents can compromise the structural integrity of buildings by damaging wood, insulation, and wiring.
  • Health Risks: Pests like cockroaches, rodents, and mosquitoes carry diseases that can endanger human health, such as salmonella, hantavirus, or West Nile virus.
  • Contamination: Food supplies in homes or businesses can be contaminated by pests through droppings or nesting materials.
  • Costly Repairs: The longer a pest infestation goes unnoticed or untreated, the more expensive it becomes to repair the resulting damage.

Top Benefits of Ongoing Pest Removal Stuart FL Services

  1. Prevention of Infestations
    Regular inspections and treatments reduce the likelihood of infestations taking hold in the first place.
  2. Early Detection of Problems
    Routine monitoring allows professionals to identify signs of pests—such as droppings or gnaw marks—early on when they are easier (and less costly) to address.
  3. Customized Treatment Plans
    Each property is unique. A recurring pest control program ensures that treatments are tailored based on your property’s design, surrounding environment, and specific risk factors.
  4. Long-Term Cost Savings
    While ongoing pest control may seem like an expense upfront, it significantly reduces the financial burden of addressing major infestations or repairing extensive damage later.
  5. Improved Comfort and Peace of Mind
    Knowing that your property is safeguarded against pests lets you focus on daily activities without worry about unexpected infestations.

Common Pests That Require Continuous Management

Pest Type Risk Factors Recommended Approach
Termites Silent wood damage; unseen colonies Regular inspections & baiting
Rodents Structural damage; disease spread Trapping & exclusion methods
Ants Rapidly expanding colonies Baiting & barrier treatments
Cockroaches Disease transmission; rapid reproduction Sanitation & routine sprays
Mosquitoes Bite irritation; disease carriers Habitat reduction & larvicide

Tips for Effective Long-Term Management

  • Maintain cleanliness by removing food crumbs and sealing garbage properly.
  • Eliminate standing water sources around the property to discourage breeding grounds for insects.
  • Seal cracks in walls or foundations where pests might enter.
  • Schedule professional inspections at least quarterly for thorough assessments.
  • Work closely with licensed pest management professionals who understand local risks.

By emphasizing consistent effort through routine care, you can protect your property from unwanted intrusions while minimizing risks associated with pests over time. A proactive approach ensures not only safety but also greater savings in resources across the long term.

Customized Pest Control Plans Tailored to Every Property’s Needs

Pest control is not a one-size-fits-all solution. Every property, whether residential or commercial, has unique needs depending on factors such as location, building design, surrounding environment, and the type of pests that are prevalent in the area. Customized pest control plans provide targeted strategies to effectively manage and prevent infestations while minimizing unnecessary treatments.

The Importance of Customization in Pest Control

  • Different Environments: Urban homes face different pest challenges compared to rural properties or businesses located near wooded areas.
  • Specific Pest Types: Some properties may face recurring ant or cockroach issues, while others deal with rodents or termites.
  • Structural Variations: Older buildings with cracks and crevices might require sealing solutions, whereas newer buildings might need preventive measures at entry points like windows and doors.
  • Health and Safety Concerns: Homes with children or pets may require eco-friendly pest control options that minimize chemical exposure.

A customized approach ensures the methods used are both effective and safe for occupants.

Key Components of a Customized Pest Management Plan

  1. A detailed assessment of the premises identifies existing infestations and potential problem areas.
  2. Inspection includes both interior spaces (e.g., kitchens, basements) and external areas such as gardens, yards, or parking lots.
  3. Specific treatments are applied based on the type of pests identified during inspection.
  4. For example:
    | Pest Type | Common Treatments | |——————-|——————————————–| | Termites | Bait systems, liquid termiticides | | Rodents | Traps, exclusion techniques | | Cockroaches | Gel baits, insect growth regulators (IGRs) |
  5. Sealing entry points like cracks in walls or gaps around doors/windows.
  6. Installing barriers such as mesh screens where needed.
  7. Educating property owners about proper sanitation practices to discourage pests.
  8. Regular follow-ups ensure that treated areas remain pest-free.
  9. Adjustments can be made based on changing conditions (e.g., seasonal changes affecting pest behavior).

Farmer applying pesticide Farmer applying pesticides in a greenhouse team pest control stock pictures, royalty-free photos & images

Benefits of a Tailored Plan

  • Cost Efficiency: Targeted treatments eliminate unnecessary applications of chemicals or methods that may not work for your specific situation.
  • Improved Effectiveness: By addressing particular property vulnerabilities, customized plans deliver better outcomes than generic approaches.
  • Sustainability: Eco-conscious solutions can be integrated into customized plans to reduce the environmental impact of pest management efforts.

How Professionals Develop Tailored Plans

Professional pest control companies rely on trained technicians who analyze each property individually. With advanced tools like moisture meters for termite detection or pheromone traps for insects, they create robust strategies tailored to your needs.

Investing in a customized plan safeguards your home or business from pests while ensuring long-term protection tailored specifically for your environment and concerns. Whether you’re managing a single-family home or a large commercial facility, personalized solutions provide an efficient way to maintain a clean, safe space year-round.

How Consistent Monitoring Leads to Early Detection of Pest Issues

Pest management is most effective when issues are identified early, before they escalate into full-blown infestations. Consistent monitoring plays a critical role in achieving this goal by enabling property owners and pest control professionals to detect signs of pests quickly and proactively address the problem. This approach not only protects the structural integrity of homes and businesses but also helps maintain hygienic conditions and saves money in the long run.

The Importance of Regular Inspections

Routine inspections are at the heart of consistent pest monitoring. These inspections allow for:
Identifying Pest Entry Points: Regular checks help locate gaps, cracks, or weak points in the building where pests may enter.
Recognizing Early Warning Signs: Droppings, nests, chewed materials, or grease marks often signal pest activity long before the issue becomes severe.
Tracking Seasonal Trends: Some pests are more active during certain times of the year. Consistent monitoring allows property owners to anticipate seasonal surges and prepare accordingly.

Key Benefits of Early Detection

  1. Cost Savings: Addressing a small pest issue is far less expensive than dealing with widespread infestations that may require extensive treatment or repairs.
  2. Preventing Structural Damage: Pests such as termites or rodents can cause significant damage to walls, wiring, and insulation if left unchecked. Catching them early minimizes repair costs.
  3. Health Protection: Certain pests like cockroaches and rodents carry diseases that could compromise human health. Early intervention reduces risks associated with contamination.
  4. Reduced Chemical Use: Smaller infestations typically require fewer pesticides or less invasive treatments compared to larger outbreaks.
Common Pests Early Warning Signs Potential Damage
Rodents Droppings, gnaw marks Chewing wires, contamination
Termites Mud tubes, hollow-sounding wood Structural damage
Cockroaches Shed skins, musty odor Contamination of food surfaces
Ants Trails leading indoors Damage to stored food supplies

Techniques for Effective Monitoring

  • Use Traps and Baits: These tools can help monitor specific pest populations while providing insight into their movement patterns.
  • Install Monitoring Stations: In areas prone to termites or ants, professional-grade monitoring systems detect activity underground before visible signs appear.
  • Engage Professional Services: Licensed pest control providers are trained to identify subtle indicators that may be overlooked by untrained individuals.
  • Maintain Records: Track inspection schedules and findings over time for better trend analysis and more informed decision-making.

Partnering with Professionals

Professional pest control services bring expertise that ensures consistent monitoring is thorough and effective. Trained technicians have access to specialized tools and resources for detecting even elusive pests. Additionally, partnering with professionals often includes scheduling regular visits tailored specifically for your property’s needs—providing an added layer of protection against future infestations.

By committing to consistent monitoring practices, homeowners and businesses can ensure that potential pest issues are detected early enough to minimize damage while safeguarding health and safety standards year-round.

Protect Your Home or Business with Preventative Pest Control Services

Preventative pest control services play a vital role in safeguarding homes and businesses from potential infestations. Rather than waiting for an infestation to occur, proactive measures help address problems before they escalate. This approach not only saves time and money but also ensures that your property remains a safe and healthy space for occupants.

Benefits of Preventative Pest Control

  • Reduced Risk of Infestations: Routine pest management keeps bugs, rodents, and other pests at bay by addressing vulnerabilities that can attract them.
  • Cost Savings: Treating an established infestation can be expensive, especially if structural damage has occurred. Preventative care is often more affordable and less disruptive.
  • Health Protection: Many pests carry diseases or allergens. By keeping them out of your home or business, you reduce the risk of health-related issues for residents, employees, or customers.
  • Peace of Mind: Knowing that your property is protected from potential threats allows you to focus on other priorities without worry.

Key Components of Preventative Pest Control Services

  1. Identifying high-risk areas such as cracks in walls, foundation gaps, or improperly sealed windows and doors.
  2. Checking for signs of pest activity like droppings, nests, or chewed materials.
  3. Addressing sources such as standing water, uncovered food, or cluttered storage spaces where pests may hide.
  4. Recommending proper waste management practices to avoid drawing pests toward the property.
  5. Sealing cracks in walls or around utility lines where pests may gain access.
  6. Installing door sweeps and repairing damaged screens to block entry points effectively.
  7. Using environmentally friendly pesticides if necessary to create a protective barrier around the property.
  8. Applying baits or traps specific to known threats in the area (e.g., ants, cockroaches).
  9. Regularly inspecting treated areas to ensure effectiveness.
  10. Adjusting methods over time as new threats arise or if property conditions change.

Common Pests Targeted with Preventative Care

Type Examples Risks
Rodents Rats, Mice Structural damage; contamination
Insects Ants, Cockroaches Food contamination; allergens
Termites Subterranean Termites Compromise structural integrity
Stinging Pests Wasps, Hornets Painful stings; allergic reactions
Wildlife Squirrels, Raccoons Property damage; potential disease

Why Hire Professionals for Prevention?

While DIY methods can be effective against minor issues temporarily, professional pest control services provide long-term solutions through expert knowledge and advanced techniques tailored to individual property needs.

By opting for preventative pest control services today, you reduce risks while ensuring safety for those who live or work within your building’s environment year-round.

Achieving Peace of Mind All Year Long with Professional Pest Control

Professional pest control services provide a reliable solution for maintaining a pest-free environment, ensuring peace of mind throughout the year. Whether you’re a homeowner or a business owner, dealing with pests can be stressful, time-consuming, and costly. By opting for professional services, you can safeguard your property from infestations and enjoy the benefits of consistent pest prevention.

Key Advantages of Professional Pest Control

  1. Trained professionals understand pest behavior, biology, and habitats.
  2. They utilize specialized tools and products that are more effective than over-the-counter solutions.
  3. Customized treatments are provided based on the specific pest type and level of infestation.
  4. Scheduled visits ensure continuous monitoring and treatment throughout all seasons.
  5. Proactive measures prevent seasonal pests like ants in summer or rodents in winter.
  6. Ongoing maintenance reduces the chances of re-infestation.
  7. Instead of spending hours trying to address pests on your own, professional services handle it efficiently.
  8. Routine service plans help detect potential problems early before they escalate.

What to Expect from Year-Round Pest Control Services

Service Feature Description
Inspection Comprehensive evaluation of property to identify entry points or infestations.
Customized Treatment Plan Tailored approach to address specific needs based on property size and type of pests.
Preventative Measures Application of barriers or deterrents to stop pests before they invade.
Regular Follow-Ups Scheduled visits to monitor progress and adjust treatments as needed.

Steps to Achieve Long-Term Peace of Mind

  1. Schedule Routine Inspections: A regular inspection allows professionals to identify early signs of pest problems that may not yet be visible to an untrained eye.
  2. Invest in Preventative Solutions: Prevention is more cost-effective than dealing with full-blown infestations later.
  3. Be Consistent with Treatments: Skipping treatments may allow pests like termites or rodents an opportunity to re-establish themselves.
  4. Educate Yourself About Pest Habits: While professionals handle treatment, understanding common pest behaviors can help you adopt habits that discourage infestations (e.g., sealing food containers or eliminating standing water).

Why Peace of Mind Matters

Pests can cause physical damage to property, spread diseases, and disrupt daily life or business operations. Knowing that experts are consistently working behind the scenes not only reduces stress but also ensures your family members, employees, customers, or tenants remain safe from harm caused by various pests.

By partnering with professional pest control providers for year-round service plans, you benefit from expertise tailored specifically for your property type while mitigating future risks effectively allowing you to focus on what matters most without unnecessary worry.